Field Extraction
The field extraction service allows you to extract common legal clauses, provisions and data points from unstructured documents and contracts, including ones written in non-standard language.
The field extraction service works asynchronously, requiring you to first make a POST to create the Field extraction request, then use a GET endpoint to poll the status of the request. Once the status is complete, you can use additional GET endpoints to obtain the results.
When you make a field extraction request, Zuva automatically applies OCR to the document (if necessary - see file submission for exceptions) and caches the OCR results for reuse by any of the other services (classification, language and OCR).
Using this guide
This guide uses plain Python 3 and built-in libraries here for illustrative purposes, but if you plan to use Python in your own code you may want to check out our prebuilt Python wrapper.
To run the code samples, you’ll need the following imports and constants:
| |
Step 1: Select field IDs
Zuva offers over 1300 built-in fields, as well as a field training API and the ability to use fields created using Zuva Create.
Find fields programmatically
To obtain a list of all available fields from the API, make a Get field list request
| |
The returned list will include all fields available to your token, including both custom and built-in fields.
For the purpose of this walkthrough, we will define some field IDs as constants:
| |
Find fields in the field library
The IDs of built-in fields are available in the Field Library (log in required).
Find field ID of a custom field in AI trainer
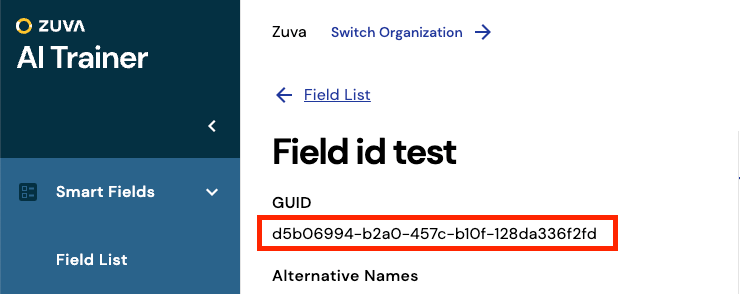
In AI trainer, the ID of each field is labelled “GUID” on the Field Details page.

Step 2: Upload your file to Zuva
Follow the instructions in the File Management Workflow to upload your file to Zuva and obtain its file_id.
Step 3: Create a field extraction request
To start processing your file, use the Create field extraction requests endpoint, providing the field_ids from step 1 and the file_id from step 2.
| |
The response includes a request_id for each file_id - in this case, since we included only one file ID, we get a single-element array. We’ll need the request_id in the next step:
| |
Step 4: Poll field extraction request status
Begin polling the Get extraction status endpoint until the status is “complete”.
Note: you should also check for a “failed” status, to avoid waiting on a request that will never complete.
| |
Step 5: Get results
The following example gets the results of the extraction:
| |
The actual results are included in the response under the top-level 'results' key. The results consist of an array with one entry for each field_id that was requested. For each field, there is an array of zero or more extractions (i.e. instances of the desired text). For example, you can print out the extractions by iterating over the results, and then iterating over the extractions for each result
| |
Step 6 (optional): Delete the file from Zuva
If desired, you may now Delete the file from Zuva. Otherwise, it will automatically be removed after 48 hours.
On This Page